
Post-construction cleaning ensures a smooth transition from construction to occupancy, preparing spaces for use by removing debris, dust, and hazards. A detailed checklist guarantees a spotless handover.
What is a Post-Construction Cleaning Checklist?
A post-construction cleaning checklist is a detailed guide outlining essential tasks to ensure a property is thoroughly cleaned and safe after construction. It includes steps like debris removal, dusting, and surface cleaning. The checklist covers areas such as kitchens, bathrooms, floors, and windows, ensuring no spot is missed. It helps identify specific cleaning needs for different surfaces, ensuring everything is spotless and ready for use. This tool streamlines the cleaning process, ensuring efficiency and completeness. By following the checklist, teams can systematically address all areas, making the final walk-through and handover smooth and stress-free. It’s a vital resource for ensuring a clean, safe, and professional finish to any construction project.
Why is Post-Construction Cleaning Important?

Post-construction cleaning is crucial for ensuring a property is safe, clean, and ready for occupancy. Construction sites often leave behind debris, dust, and potential hazards, which can pose risks to health and safety. A thorough cleanup removes these hazards, creating a hygienic environment. It also enhances the appearance of the space, making it presentable for owners or tenants. Neglecting this step can lead to damage to surfaces or equipment, as residue and dust can degrade materials over time. Proper cleaning ensures all systems and fixtures function correctly, avoiding future maintenance issues. Additionally, it leaves a professional finish, boosting satisfaction and trust in the project’s quality. A clean site is not just visually appealing but also essential for practical and safety reasons.

Key Areas to Focus on in Post-Construction Cleaning
Key areas in post-construction cleaning include debris removal, dusting, and thorough floor cleaning. These steps ensure a clean, safe, and visually appealing environment for occupancy or use.
Removal of Construction Debris
Removal of construction debris is the first critical step in post-construction cleaning. This involves clearing the site of leftover materials, tools, and waste from the building process. Debris such as scraps of wood, metal, plastic, and packaging materials must be collected and disposed of properly. Dust, dirt, and other residues from construction activities should also be addressed to ensure a clean slate. Proper disposal methods, such as recycling or using designated waste bins, are essential to maintain environmental responsibility. This step ensures the space is safe and free from hazards, creating a foundation for the next cleaning tasks. A detailed checklist helps track progress and ensures no debris is overlooked.
Dusting and Sweeping
Dusting and sweeping are essential steps in post-construction cleaning, focusing on removing loose dust, dirt, and particles from surfaces. Start with dry cleaning methods to eliminate debris from beams, ductwork, and fixtures. Use microfiber cloths or dusters to wipe down surfaces, ensuring no area is missed. Floors, especially, require thorough sweeping or vacuuming to prepare them for polishing. Pay extra attention to corners, baseboards, and hard-to-reach areas where dust often accumulates. This step ensures a clean foundation for further tasks like mopping or applying finishes. A detailed checklist helps track progress, ensuring all surfaces are dust-free and ready for the next phase of cleaning.
Floor Cleaning and Polishing
Floor cleaning and polishing are critical steps in post-construction cleaning, ensuring surfaces are safe, clean, and visually appealing. Begin by removing any remaining debris or dust from the floors. For hard surfaces like wood, tile, or concrete, use appropriate cleaning solutions and scrubbers to eliminate dirt and construction residue. Rinse thoroughly and allow floors to dry before applying polishes or sealants. For carpets, vacuuming and spot-cleaning stains are essential. Polishing enhances the appearance of floors and protects them from wear. Ensure all flooring types, from hardwood to tile, are addressed according to their specific needs. A well-executed floor cleaning process leaves the space looking professional and ready for occupancy.
Detailed Cleaning Tasks for Different Surfaces
Detailed Cleaning Tasks for Different Surfaces
This section outlines specific cleaning methods for various surfaces, ensuring each material is treated appropriately for optimal results and longevity, addressing unique needs of each surface type effectively.
Cleaning Windows and Mirrors
Cleaning windows and mirrors requires careful attention to detail to achieve a streak-free finish. Use a mixture of water and mild detergent or specialized glass cleaners. Start by removing any stickers, labels, or residue using a scraper or adhesive remover. Spray the solution onto the surface and wipe down using a lint-free cloth or microfiber cloth. For larger windows, a squeegee is effective for even cleaning. Avoid using paper towels to prevent lint residue. Finally, inspect the surfaces under natural light to ensure clarity and remove any remaining streaks. For mirrors, repeat the process, ensuring no water spots remain. This step ensures transparency and reflectivity, enhancing the overall appearance of the space.
Wipe Down Surfaces and Fixtures
Wipe down all surfaces and fixtures to remove dust, dirt, and construction residue. Start with countertops, cabinets, and shelves using a damp cloth or sponge. For fixtures like faucets, door handles, and light switches, use a disinfectant solution to ensure hygiene. Pay special attention to areas around electrical outlets and switches, as they often collect dust. Use a microfiber cloth to wipe down door frames, baseboards, and windowsills. For stubborn stains or adhesive residue, apply a gentle cleaning product and scrub lightly before rinsing. This step ensures all surfaces are clean, free of streaks, and ready for use. Properly sanitized fixtures and surfaces contribute to a safe and welcoming environment.
Sanitizing Bathrooms and Kitchens
Sanitizing bathrooms and kitchens is crucial for ensuring hygiene and safety. Use disinfectant solutions to clean all surfaces, including sinks, toilets, showers, and bathtubs. Pay special attention to high-touch areas like faucets, mirrors, and countertops. In the kitchen, focus on appliances, cabinets, and countertops, removing any grease or grime. Use a gentle yet effective cleaner for delicate surfaces like stainless steel or marble. Ensure all areas are rinsed thoroughly to remove cleaning product residue. Disinfect floors using a suitable cleaning solution to eliminate germs and bacteria. This step ensures these spaces are not only clean but also safe for occupancy, making them ready for daily use.

Specialized Cleaning Requirements
Specialized cleaning involves addressing unique surfaces and materials, such as removing stubborn residue or stickers, and handling exterior waste disposal. Tailored techniques ensure thorough and damage-free results.
Dry Cleaning vs. Wet Cleaning
Dry cleaning involves removing loose debris like dust and dirt using methods such as sweeping, vacuuming, or dusting. This step is crucial before wet cleaning, as it prevents mud and grime from forming. Wet cleaning, on the other hand, uses water-based solutions to deep clean surfaces, removing stubborn stains and residue. The choice between the two depends on the surface type and level of soiling. For example, delicate surfaces may require dry cleaning to avoid damage, while heavily soiled areas benefit from wet cleaning. A thorough post-construction cleaning checklist should outline when and where to use each method to ensure effective results and prevent damage to materials.
Handling Stickers, Labels, and Residue
Removing stickers, labels, and residue is a critical step in post-construction cleaning to ensure surfaces are clean and free from leftover materials. Use tools like scrapers or solvents to gently peel off stickers without damaging finishes. For stubborn residue, apply specialized cleaning products designed for adhesive removal. Always test a small area first to avoid surface damage. After removal, wipe down surfaces with a damp cloth to eliminate any remaining traces. This process is essential for maintaining the appearance and functionality of materials, ensuring a professional finish. Include this task in your checklist to guarantee no stickers or residue are overlooked during the final cleanup.
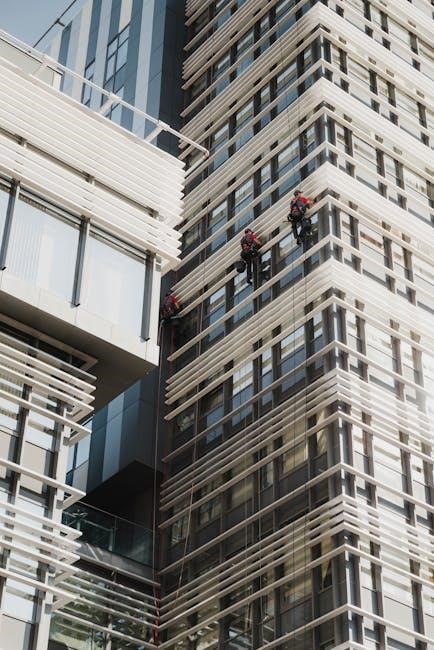
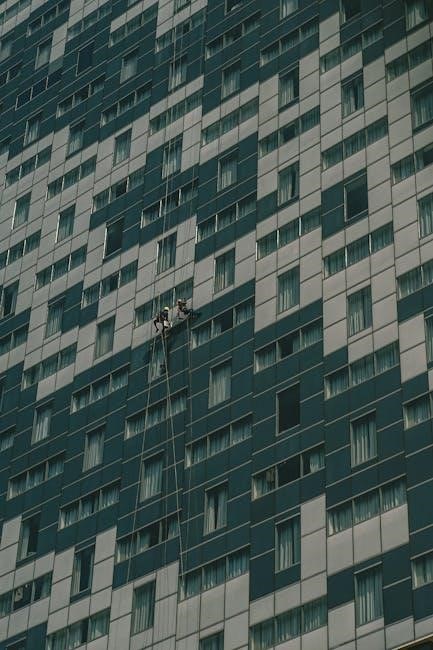
Exterior Cleaning and Waste Disposal
Exterior cleaning is essential for completing the post-construction process, ensuring the property looks polished and well-maintained. Start with power washing sidewalks, driveways, and exterior walls to remove dirt, grime, and construction stains. Clean windows and doors from the outside, and ensure all outdoor lighting fixtures are free of debris. Organize waste disposal by segregating materials like wood, metal, and plastics, and arrange for proper recycling or removal. Trim any overgrown vegetation and sweep away leaves or dust from outdoor areas. Use a checklist to ensure no exterior detail is overlooked, from cleaning gutters to removing leftover construction materials. A clean exterior enhances curb appeal and ensures a professional handover.
Tools and Supplies Needed
Essential tools include brooms, vacuums, mops, squeegees, and scrubbers. Stock up on cleaning solutions, microfiber cloths, gloves, masks, and protective gear for safe and efficient cleaning. Use a checklist to ensure all items are covered.
Essential Cleaning Equipment
Essential cleaning equipment for post-construction includes wet/dry vacuums for debris removal, pressure washers for exterior surfaces, and floor scrubbers for large areas. Steam cleaners are ideal for sanitizing surfaces without chemicals, while squeegees and ladders are must-haves for window cleaning. Dusters and microfiber cloths are perfect for dusting surfaces, and mops with interchangeable heads ensure versatility. Scrub brushes tackle stubborn stains, and protective gear like gloves and masks ensure safety. A checklist helps track all necessary equipment, ensuring no tool is overlooked and the site is thoroughly cleaned before handover.
Safety Gear for Cleaners
Safety gear is crucial for cleaners in post-construction environments. Hard hats protect from falling debris, while steel-toe boots guard against sharp objects. Gloves prevent cuts and chemical exposure, and goggles shield eyes from dust and cleaning agents. Dust masks or respirators are essential for reducing inhalation of airborne particles. High-visibility vests ensure cleaners are seen in low-light areas. Earplugs protect hearing from loud equipment. A first aid kit should always be on hand. Ensuring cleaners wear appropriate personal protective equipment (PPE) minimizes risks and ensures a safe working environment throughout the cleaning process. This gear is a vital part of any comprehensive cleaning checklist.
A thorough post-construction cleaning checklist ensures a smooth handover. Final walk-throughs confirm all areas are clean, safe, and ready for occupancy.
Final Walk-Through and Handover
The final walk-through is the last step before project handover, ensuring all spaces meet quality standards. This process involves verifying that every item on the checklist has been completed, from debris removal to surface sanitization. It’s crucial to check for any overlooked details, such as dust on light fixtures or residue on windows. Once everything is confirmed clean and safe, the property is officially ready for occupancy or use. A comprehensive checklist ensures that no task is missed, providing peace of mind for both contractors and clients. This step guarantees a smooth transition and a satisfactory project completion.
Importance of a Comprehensive Checklist
A comprehensive checklist is essential for ensuring post-construction cleaning is thorough and efficient. It helps organize tasks, from debris removal to surface sanitization, and ensures no detail is overlooked. By following a structured plan, cleaners can systematically address each area, reducing the risk of missed spots. A detailed checklist also promotes accountability, as it provides a clear guide for what needs to be done. This not only saves time but also ensures the final result meets high standards. A well-designed checklist is reusable and adaptable, making it a valuable tool for future projects. It guarantees a clean, safe, and professional finish, which is critical for client satisfaction.