Welcome to the Singer Sewing Machine Owner’s Manual, your comprehensive guide to understanding and mastering your machine. This manual provides essential insights for setup, troubleshooting, and maintenance, ensuring optimal performance for both beginners and experienced sewists. With a legacy dating back to 1851, Singer machines are trusted tools for creativity and craftsmanship, offering durability and versatility for every sewing project.
1.1 Overview of the Manual
This manual is a detailed guide designed to help you understand and operate your Singer sewing machine effectively. It covers essential topics such as setting up your machine, threading, stitch selection, and maintenance. The manual also provides troubleshooting tips for common issues like thread tension problems and bobbin management. Additionally, it includes resources for downloading free PDF manuals, accessing online support, and finding repair services. Whether you’re a beginner or an experienced sewist, this manual offers comprehensive support to ensure your Singer machine runs smoothly and efficiently, helping you achieve professional results in every stitch.
1.2 Importance of the Manual for Beginners
The manual is an invaluable resource for beginners, offering clear, step-by-step instructions to help new users master their Singer sewing machine. It simplifies complex tasks like threading, bobbin insertion, and stitch selection, reducing confusion and frustration. By understanding the machine’s parts and functions, beginners can build confidence and improve their sewing skills. The manual also addresses common issues and provides troubleshooting solutions, ensuring seamless learning. With its comprehensive guidance, the manual empowers novices to unlock their machine’s full potential, making it an essential companion for every sewing journey.
1.3 Key Features of Singer Sewing Machines
Singer sewing machines are renowned for their durability, versatility, and innovative features. Many models include heavy-duty frames, powerful motors, and an array of stitch options, making them suitable for various sewing projects. Advanced machines offer automatic needle threading, programmable stitch settings, and LED lighting for improved visibility. Some models also feature electronic controls, memory storage for custom stitches, and compatibility with modern sewing accessories. These features cater to both beginners and experienced sewists, ensuring efficient and precise sewing experiences. Singer machines are designed to handle tough fabrics and deliver professional-quality results, making them a trusted choice for sewers worldwide.
Understanding Your Singer Sewing Machine
This section helps you familiarize yourself with your Singer sewing machine, covering its basic components, operation, and essential setup tips for smooth sewing experiences.
2.1 Basic Parts and Components
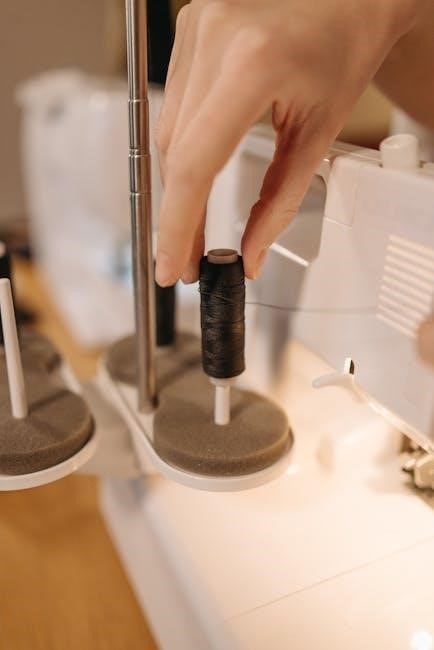
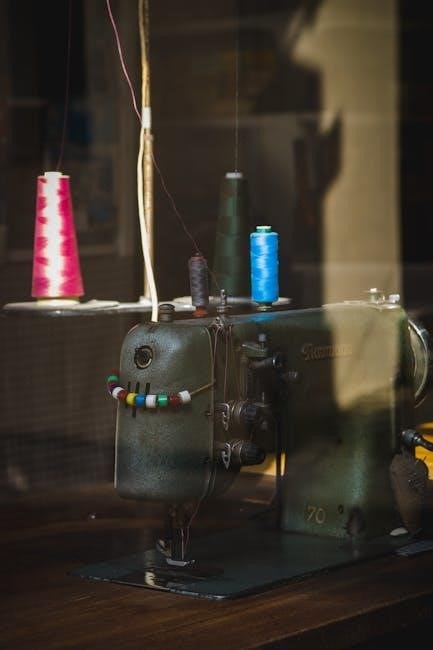
Your Singer sewing machine consists of several key components essential for its operation. The spool pins hold the thread, while the bobbin area manages the lower thread supply. The stitch selector allows you to choose different stitch patterns, and the tension dials adjust thread tightness. The foot pedal controls sewing speed, and the reverse stitch lever secures seams. Understanding these parts helps you operate the machine effectively and troubleshoot issues. Familiarizing yourself with each component ensures proper use and maintenance, enhancing your sewing experience.
2.2 Setting Up Your Machine
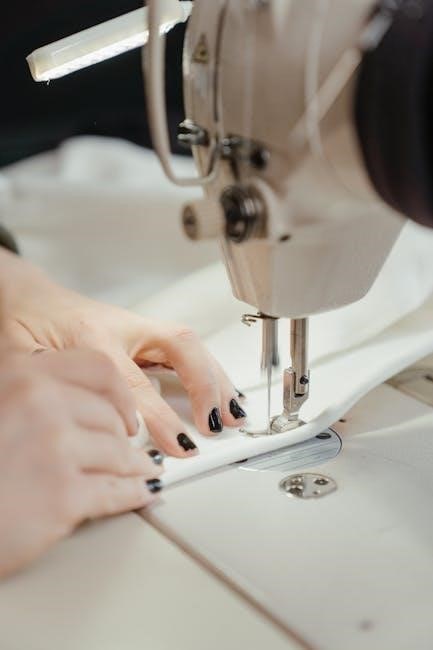
Setting up your Singer sewing machine begins with unpacking and placing it on a stable surface. Plug in the power cord and ensure the machine is positioned away from direct sunlight. Thread the machine as per the manual, starting from the spool pin to the needle. Wind a bobbin and insert it correctly into the bobbin case. Select the appropriate presser foot for your fabric type and lower it securely. Always refer to the manual for specific setup instructions, as steps may vary slightly between models. Proper setup ensures smooth operation and prevents potential issues during sewing.
2.3 Safety Precautions
Always unplug the machine when not in use or during maintenance to prevent accidental start-ups. Keep loose clothing and long hair tied back to avoid entanglement with moving parts. Use the correct presser foot for your fabric type to maintain control and prevent fabric slippage. Ensure the work area is well-lit and free from clutter to minimize tripping hazards. Avoid touching sharp components like needles or cutters with bare hands; Never leave the machine unattended while it is operational, especially if children are nearby. Always follow the manufacturer’s guidelines for safe operation.
Threading and Bobbin Management
This section covers essential techniques for threading your Singer sewing machine and managing bobbins effectively. Learn how to ensure proper thread tension and troubleshoot common issues for smooth sewing operations.
3.1 Step-by-Step Threading Guide
Properly threading your Singer sewing machine is crucial for smooth operation. Start by placing the spool on the spool pin and pulling the thread through the tension discs. Loop the thread around the take-up lever, ensuring it sits correctly in the slot. Guide the thread through the channel and insert it into the needle’s eye. Gently pull the thread to remove any slack. Turn the handwheel to lower the needle and set the thread tension. Always test the thread by sewing on scrap fabric to ensure even stitching. For detailed visuals, refer to your Singer sewing machine manual.
3.2 Inserting and Managing Bobbins
Inserting and managing bobbins correctly ensures smooth stitching. Begin by winding the bobbin with the appropriate thread, leaving a small tail. Open the bobbin compartment and place the bobbin inside, aligning it with the machine’s mechanism. Gently pull the thread to ensure it’s seated properly. Close the compartment and guide the thread through the tension spring. Pull the thread lightly to set the tension. Always use the correct size and type of bobbin for your Singer machine. Keep spare bobbins handy for quick changes. Avoid overfilling the bobbin, as this can cause stitching issues. Proper bobbin management enhances sewing efficiency and quality.
3.3 Common Issues with Thread Tension
Thread tension issues are common but easily fixable. Uneven tension can cause puckering, loose stitches, or breaking thread. Incorrect thread guide alignment or improper bobbin installation often leads to these problems. Overtightening the thread can disrupt the machine’s tension balance. Bobbin tension may also be too loose or tight, causing loops on the fabric’s underside. To resolve, check the thread path, ensure the bobbin is correctly seated, and adjust the tension dials as needed. Using the right thread type and regular maintenance can prevent tension-related problems. Always refer to the manual for specific tension settings for different fabrics and stitches.
Stitch Selection and Adjustment
Singer machines offer versatile stitch options for various fabrics and tasks. Easily select and adjust stitch length, width, and type to achieve desired results for professional finishes.
4.1 Types of Stitches Available
Singer sewing machines offer a wide variety of stitches to cater to different sewing needs. Common stitches include straight stitch, zigzag, satin stitch, and overlock. Decorative stitches like scallop and blind hem are also available for embellishments. Heavy-duty models feature specialized stitches for thicker fabrics, while computerized models offer advanced decorative and stretch stitches. The range ensures versatility for quilting, embroidery, and everyday sewing. Users can easily switch between stitches using the machine’s controls, making it suitable for both beginners and experienced sewists. This diversity allows for creative freedom and professional-grade results across various projects.
4.2 Adjusting Stitch Length and Width
Adjusting stitch length and width on Singer sewing machines is straightforward, allowing customization for various fabrics and projects. The stitch length determines how much fabric is sewn between each stitch, while the width affects the stitch’s horizontal size; Most models feature a dial or electronic controls for easy adjustments. Longer stitches are ideal for heavy fabrics, while shorter ones suit delicate materials. Narrow widths are best for straight lines, and wider settings are great for decorative or overlock stitches; Proper adjustment ensures even stitching, prevents fabric stretching, and enhances the overall quality of your sewing projects. Always test settings on scrap fabric before sewing.
4.3 Specialized Stitches for Different Fabrics
Singer sewing machines offer specialized stitches tailored for various fabrics, ensuring optimal results. For delicate fabrics like silk or chiffon, a shorter, tighter stitch prevents tearing. Heavier fabrics, such as denim or canvas, benefit from longer, stronger stitches or reinforced options. Knits and stretchy materials require zigzag or stretch stitches to maintain elasticity. The manual provides guidance on selecting the perfect stitch for each fabric type, enhancing seam quality and durability. Always test stitches on scrap fabric before sewing to achieve the best outcome for your project.

Maintenance and Care
Regular maintenance ensures optimal performance. Always dust and oil your machine, store it in a dry place, and use a cover to protect it from dust buildup. This extends its lifespan and keeps it functioning smoothly. Refer to the manual for specific care instructions tailored to your Singer model. Proper upkeep guarantees years of reliable sewing and prevents potential mechanical issues. Regularly cleaning and lubricating ensures all parts work harmoniously.
5.1 Cleaning the Machine
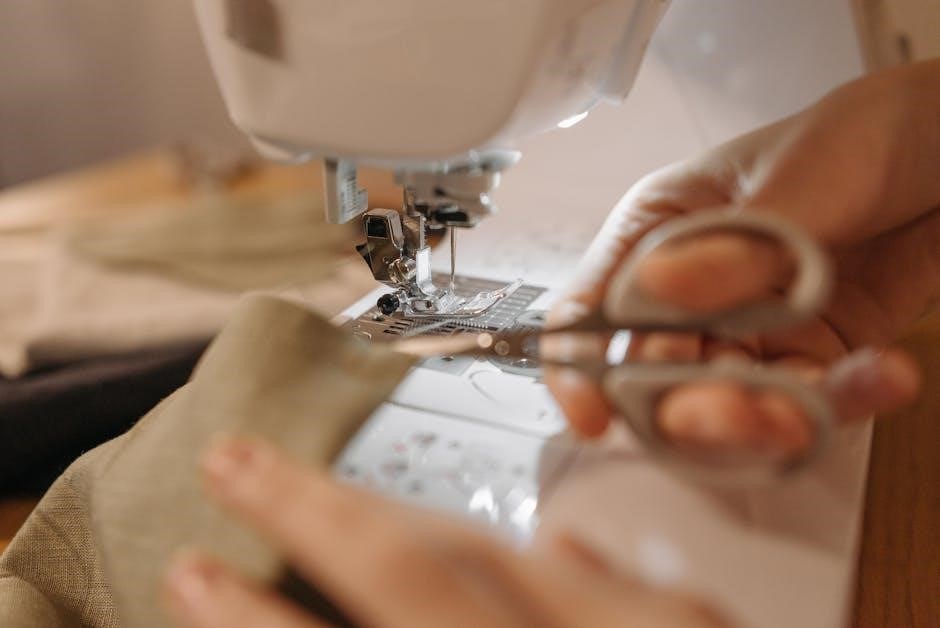
Cleaning your Singer sewing machine regularly is essential for maintaining its performance. Turn off and unplug the machine before starting. Use the provided brush to gently remove lint and debris from the bobbin area, tension discs, and stitch plate. For stubborn dust, a soft, dry cloth or compressed air can be used. Avoid harsh chemicals or liquids, as they may damage the finish or internal components. Clean after each use to prevent buildup and ensure smooth operation. Regular cleaning also helps prevent thread jams and maintains stitch quality. Refer to your manual for specific cleaning instructions tailored to your model.
5.2 Oil and Lubrication Requirements
Proper lubrication is vital to keep your Singer sewing machine running smoothly. Use only Singer-recommended sewing machine oil to avoid damaging the internal mechanisms. Apply a few drops to the hook area and shuttle race periodically, as specified in your manual. Over-lubrication can attract dust and cause issues, so use it sparingly. Regular oil maintenance ensures smooth stitch formation and reduces wear on moving parts. Always turn the handwheel gently after lubricating to distribute the oil evenly. For heavy-duty models, more frequent lubrication may be required. Refer to your manual for specific guidelines tailored to your machine’s needs.
5.3 Replacing Parts and Accessories
Regularly replacing worn or damaged parts ensures optimal performance of your Singer sewing machine. Always use genuine Singer parts to maintain quality and compatibility. Common replacements include needles, bobbins, and belts. Refer to your manual for specific part numbers and replacement instructions. Turn off and unplug the machine before starting any replacement. Use the correct tools to avoid damaging internal components. If unsure, consult a professional or Singer-authorized service center. Keep spare parts on hand to avoid downtime. Proper replacement maintains stitch quality and extends the machine’s lifespan. Always test the machine after replacement to ensure smooth operation.
Troubleshooting Common Problems
Identify and resolve common issues like thread breakage, jams, or uneven stitches. Use the manual for guidance. Regular maintenance prevents many problems. Seek professional help if needed.
6.1 Solving Thread Tension Issues
Thread tension issues are common but easily fixable. If stitches are uneven or fabric puckers, check the thread path for tangles or improper routing. Adjust the tension dial to balance the upper and lower thread. Ensure the bobbin is correctly inserted and not overfilled. Re-thread the machine following the manual’s guide. If problems persist, clean lint from the tension discs and retest. Regularly check and maintain proper tension to prevent fabric distortion or thread breakage. Refer to the manual for specific tension settings for different fabrics and stitch types.
6.2 Fixing Jammed Threads
If threads become jammed, stop sewing immediately and turn off the machine. Carefully cut the tangled thread above the fabric. Remove the bobbin and check for loose threads or debris. Gently pull out any remaining thread fragments. Re-thread the machine, ensuring the thread follows the correct path. Test on scrap fabric to ensure smooth operation. Avoid pulling threads forcefully, as this can damage the machine. Regular cleaning and proper threading techniques help prevent jams. If the issue persists, consult the manual or contact Singer support for assistance.
6.3 Resolving Bobbin Winding Problems
If the bobbin winds unevenly or stops winding, check for obstructions in the bobbin area. Ensure the bobbin is properly seated and aligned. Remove any tangled thread and restart the winding process. If the machine struggles to wind, verify that the thread is correctly threaded through the bobbin winder. Clean the bobbin winder regularly to remove lint or debris. Avoid overfilling the bobbin, as this can cause winding issues. Use the correct type of thread for your machine and fabric. If problems persist, refer to the manual or contact Singer customer support for further assistance.
Singer Sewing Machine Models
Singer offers a variety of sewing machine models, catering to different needs and skill levels, from basic mechanical machines to advanced computerized and heavy-duty models.
7.1 Overview of Popular Models
Singer sewing machines are available in a wide range of models to suit various sewing needs. Popular models include the Singer 4423, known for its heavy-duty construction and 23 built-in stitches, and the Singer 7258, a computerized model with 100 stitches for versatility. The Singer 9985 is a top-of-the-line option with advanced features like automatic threading and a vast stitch library. These models cater to beginners, hobbyists, and professionals, offering reliability and innovation. Understanding the features of these models helps users choose the right machine for their specific sewing requirements, ensuring optimal performance and satisfaction.
7.2 Heavy-Duty Series
The Singer Heavy-Duty Series is designed for demanding sewing tasks, offering exceptional durability and power. Models like the Singer 4423 and 4432 feature robust metal frames, capable of handling thick fabrics such as denim and canvas. These machines are ideal for heavy-duty projects and commercial use, with high stitch speeds and powerful motors. They include features like automatic needle threading and a variety of stitch options. The Heavy-Duty Series is perfect for sewists who need reliability and performance for tough sewing jobs, making them a favorite among professionals and serious hobbyists who require long-lasting machines for heavy workloads.
7.3 Electronic and Computerized Models
Singer’s electronic and computerized sewing machines offer advanced features for precise and versatile sewing. Models like the Singer Quantum Stylist 9960 and Singer Legacy SE300 boast large touchscreens, hundreds of built-in stitches, and wireless connectivity. These machines often include features like automatic needle threading, thread cutters, and customizable stitch settings. They cater to both hobbyists and professionals, providing superior control over complex projects. With integrated memory and USB connectivity, users can easily update software or import custom designs. These models represent Singer’s commitment to innovation, blending tradition with modern technology to enhance sewing experiences and expand creative possibilities for all skill levels.

Singer’s Legacy and Innovation
Singer’s legacy is rooted in revolutionizing sewing through innovative designs and accessibility, maintaining their position as a leader in the industry for over a century.
8.1 History of Singer Sewing Machines
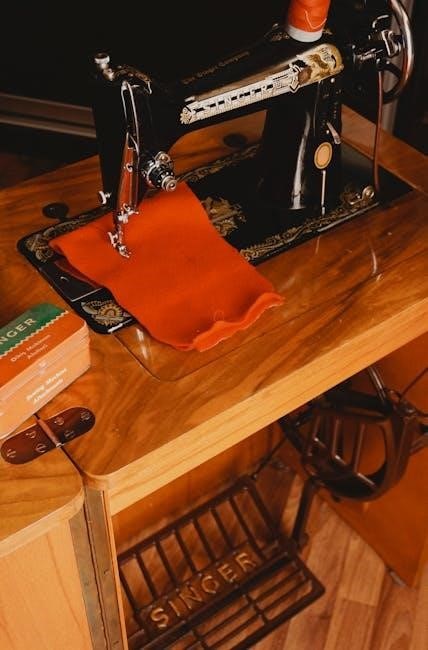
The Singer Sewing Machine Company, founded in 1851 by Isaac Merritt Singer, revolutionized sewing with its pioneering designs. Singer’s first practical sewing machine, patented in 1851, simplified stitching for both industrial and domestic use. The company’s machines quickly gained popularity due to their durability and efficiency. Singer introduced the first portable sewing machine, the “Red Eye Singer,” which became a staple in homes worldwide. Over the years, Singer sewing machines played a pivotal role in industrialization and home sewing, earning a reputation for innovation and reliability. Their legacy continues to influence sewing technology and culture globally.
8.2 Isaac Merritt Singer and His Contribution
Isaac Merritt Singer, a visionary inventor and entrepreneur, played a cornerstone role in revolutionizing sewing technology. His improvements to the sewing machine in the 1850s made it practical for widespread use. Singer’s innovative design introduced a horizontal needle and a shuttle that simplified stitching, making sewing faster and more efficient. His contributions led to the development of the first commercially successful sewing machine, the “Red Eye Singer,” which became indispensable for both home and industrial use. Singer’s inventions not only transformed the sewing industry but also laid the foundation for modern sewing machines, leaving a lasting legacy in creativity and productivity.
8.3 Evolution of Singer Sewing Machines
The Singer sewing machine has undergone significant transformations since its inception. From the early mechanical models to modern computerized versions, each generation incorporated advancements in technology and design. The 1880s saw the introduction of electric sewing machines, while the 20th century brought electronic models with automated features. Recent innovations include touchscreen interfaces, Wi-Fi connectivity, and mobile app integration. These advancements have enhanced stitching accuracy, versatility, and user convenience. Singer’s commitment to innovation ensures its sewing machines remain indispensable for crafters and professionals alike, blending tradition with cutting-edge technology to meet evolving sewing needs.

Modern Features of Singer Sewing Machines
Modern Singer sewing machines boast cutting-edge features like advanced stitching options, compatibility with modern tools, and innovative apps, enhancing sewing efficiency and creativity for all users.
9.1 Advanced Stitching Options
Modern Singer sewing machines offer a wide range of advanced stitching options, including decorative, stretch, and heirloom stitches. These machines often feature customizable stitch lengths, widths, and patterns, allowing for precise control. Many models include memory functions to save favorite stitches and one-touch button selection for convenience. Some machines also offer automatic stitch adjustment based on fabric type. Additionally, advanced models may include specialized stitches for quilting, embroidery, or heavy-duty sewing. These features cater to both beginners and experienced sewists, enabling them to create professional-quality projects with ease and versatility.
9.2 Compatibility with Modern Accessories
Singer sewing machines are designed to be compatible with a variety of modern accessories, enhancing functionality and versatility. Many models support interchangeable presser feet, embroidery hoops, and extension tables, allowing users to expand their creative possibilities. Additionally, Singer machines often work seamlessly with adapters for specialized tasks, such as quilting or heavy-duty sewing. This compatibility ensures that users can leverage the latest tools and technologies to achieve professional-quality results. Whether it’s a new presser foot or a high-tech embroidery attachment, Singer machines are built to adapt to modern sewing needs, maintaining performance and precision.
9.3 The Singer Sewing Assistant App
The Singer Sewing Assistant App is a revolutionary tool designed to enhance your sewing experience. It provides step-by-step guides, tutorials, and maintenance tips to help you get the most out of your machine. The app also offers access to a library of sewing projects, allowing you to explore new ideas and techniques; With features like troubleshooting support and a digital manual, it serves as a handy companion for both beginners and experienced sewists. The app is compatible with most Singer models, ensuring you stay connected and creative with the latest sewing innovations.
Resources for Singer Sewing Machine Owners
Access official Singer resources, including downloadable manuals, online tutorials, and communities. Find repair centers and exclusive sewing tips to enhance your sewing journey with Singer machines.
10.1 Downloading Manuals and Guides
Downloading Singer sewing machine manuals and guides is straightforward. Visit Singer’s official website or authorized dealers for PDF versions tailored to your specific model. Use the model number for precise searches. These resources cover operation, maintenance, and troubleshooting. Additional guides, such as stitch charts and accessory instructions, are often included. Ensure to download from trusted sources to avoid security risks. Manuals are updated regularly, so check for the latest versions. This ensures you have the most accurate and comprehensive information for optimal machine performance and care.
10.2 Online Support and Communities
Singer offers extensive online support through their official website, including FAQs, troubleshooting guides, and video tutorials. Join sewing communities on forums like Singer’s official forum or social media groups dedicated to Singer sewing machines. These platforms connect you with experienced users and experts, providing tips, solutions, and inspiration. Many enthusiasts share hacks and creative projects, fostering a supportive environment for learners. Additionally, YouTube channels and blogs often feature Singer-specific content. Engaging with these resources enhances your sewing experience and helps resolve issues quickly, ensuring you get the most from your machine.
10.3 Finding Repair and Service Centers
To maintain your Singer sewing machine, locating authorized repair centers is essential. Visit Singer’s official website for a directory of certified service providers. Enter your location to find nearby centers. Additionally, contact Singer’s customer support via phone or email for recommendations. Local sewing shops or dealers may also offer repair services. Always verify the center’s credentials to ensure genuine Singer parts and expert care. Regular maintenance by professionals extends your machine’s lifespan and keeps it functioning optimally.
This concludes the Singer Sewing Machine Owner’s Manual. We hope you found it helpful in understanding and utilizing your machine effectively. Happy sewing!
11.1 Summary of Key Points
This manual has guided you through understanding your Singer sewing machine, from basic setup to advanced features. Proper threading, stitch selection, and maintenance are crucial for optimal performance. Troubleshooting tips and resource access ensure longevity and efficiency. Singer’s legacy, combined with modern innovations, makes these machines versatile for all skill levels. By following the guidelines, you can enhance your sewing experience and create high-quality projects. Remember to explore resources for further support and keep your machine well-maintained for years of reliable service. Happy sewing with your Singer!
11.2 Encouragement to Explore and Create
Now that you’ve mastered the basics, embrace the freedom to explore and create! Singer sewing machines are designed to inspire creativity, whether crafting home decor, tailoring garments, or embroidering intricate designs. Experiment with various fabrics, stitches, and techniques to discover your unique style. Don’t hesitate to try new projects—every stitch is a step toward mastery. Remember, sewing is not just a skill but a form of self-expression. Push your limits, and let your Singer machine be your partner in bringing your imaginative ideas to life. Sewing is a journey, and the joy is in the creation!
11.3 Final Tips for Machine Longevity
To ensure your Singer sewing machine lasts for years, regular maintenance is essential. Always clean the machine after use, removing lint and debris from the bobbin area and tension discs. Use the recommended oil for lubrication, avoiding excessive amounts that could attract dust. Store the machine in a dry, cool place, away from direct sunlight. Avoid using improper thread or needles, as they can damage the machine. Finally, schedule professional servicing every 1-2 years to maintain optimal performance. By following these tips, you’ll preserve your Singer sewing machine’s longevity and reliability for countless creative projects.